
Partial Screen Screenshot – Windows
Did you know that there is a tool built into Windows to allow you to take a partial screenshot? Most of you probably already know that you can press the Windows key and the “PrtSc” (Print Screen) button to get a screenshot of your entire screen. Windows has a Snipping Tool that allows users to select a portion of the screen to make into an image.
How to Find the Snipping Tool
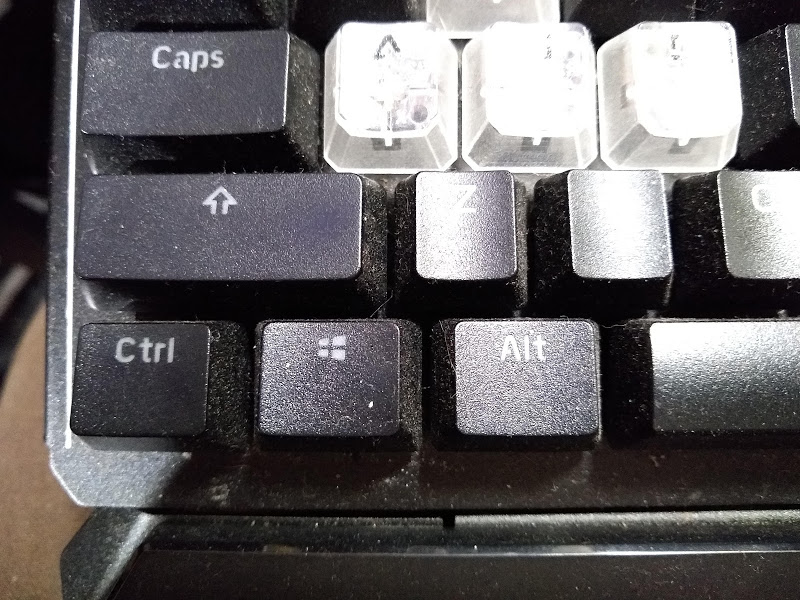
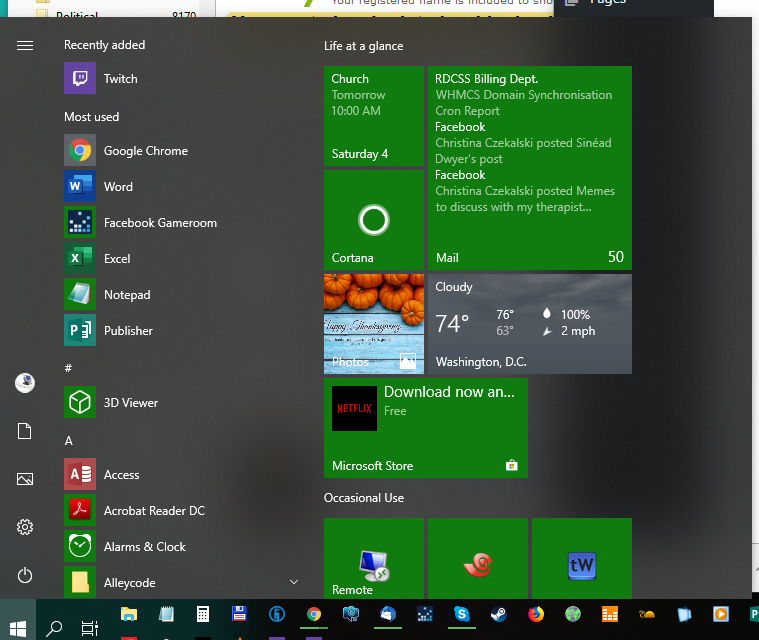
Press the Windows key on your keyboard. It is usually located between the ALT and CTRL keys on the left side of your space bar. Alternately, you can click on the START button in the lower left of the screen on the taskbar.
It will pop up a window with your installed programs and some recently used programs.
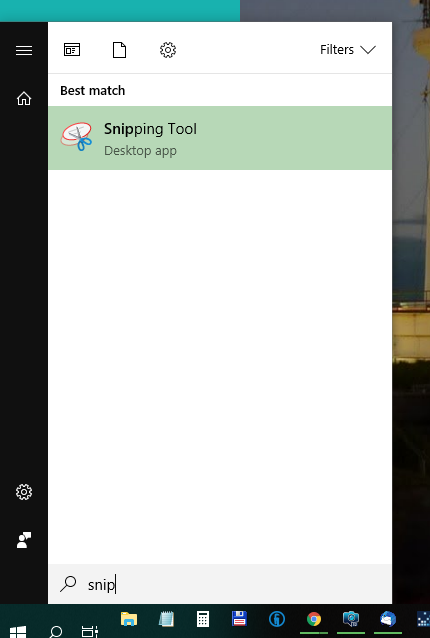
Type “snip” – it will automatically perform a search and look like this:
How to Use the Snipping Tool
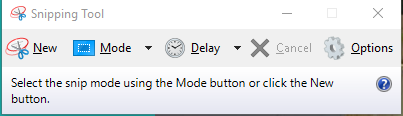
Hit ENTER or click Snipping Tool with the mouse. This will result in a tiny window opening on your desktop (it may blend in with what is already open initially – here’s what to look for):
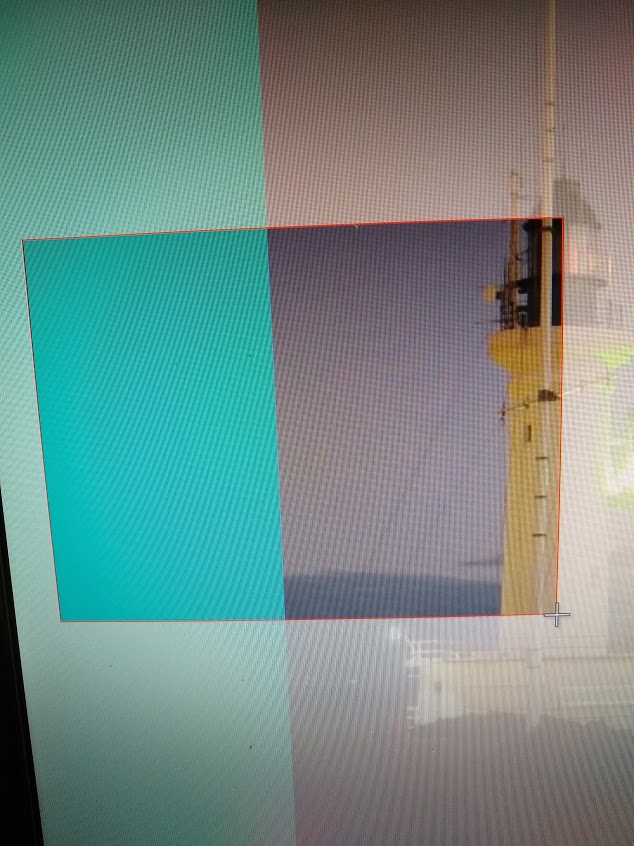
Click New to start a new screen snip. The rest of your screen will appear “whited out” while you are in snip mode. Click at one corner of the area you wish to snip and drag to the opposite corner. That area will have a red line around it and the selected area will be normal colors.
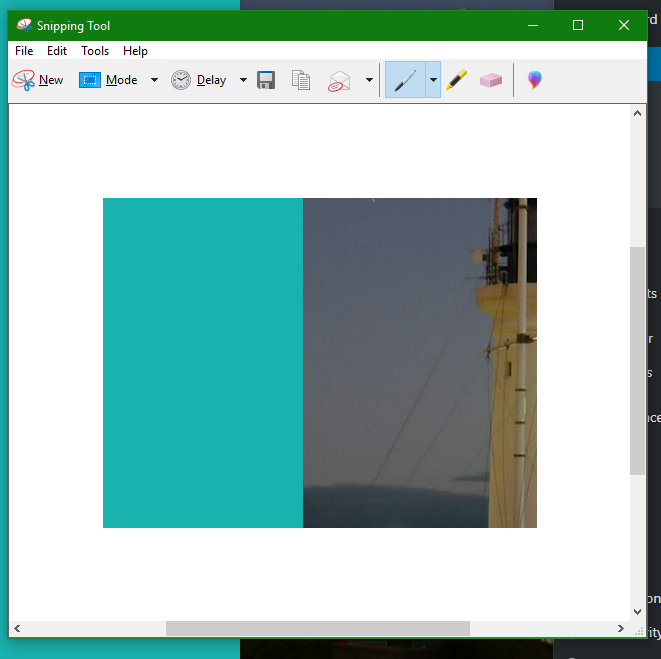
When you let go of the mouse button, the result will be shown inside the Snipping Tool window.
Click the floppy disk icon to save your Snip, and you’re done!